Introduction
As well as the telescope pier I like to have a DSLR (an astro-modified Canon EOS 450D) on a Skywatcher Star Adventurer mount around in the garden. It makes for a nice little mobile arrangement that can be set up at a moment’s notice. Usually the set up consists of the camera, a lens warmer, power for the mount and an intervalometer for controlling the timing of pictures being captured.
Having really enjoyed setting up a Raspberry Pi 4 running KStars, EKOS and INDI for the pier based telescope I thought that putting a ‘one stop’ solution together, able to do the same as the above plus a few extras, for the DSLR would be a great little side project.
There are a few little limitations that I like to be able to overcome with the current DSLR set up.
Battery life on the DSLR is pretty short usually, and getting shorter as the battery ages. I am currently getting about three to three and a half hours. To do longer star trails and so on, ideally I would like that limitation to go altogether.
The mount and heater are powered with a portable battery, and again diminishing battery life proves to be a bit of an issue.
Lastly, a minor point; messing about with SD cards or plugging the camera into a laptop to get the images. It would be nice to be able to do that remotely without wires or carrying cards about.
Requirements
I decided that the control box would have to be able to fulfil the following requirements:
- Provide power for the DSLR, lens warmer and Skywatcher mount
- Download image data from the DSLR to local storage
- Be able to send and receive data over my local network (WiFi or ethernet) for remote desktop control and downloading images
- Be powered from a 12 V power supply
- Perform the above tasks reliably and ideally in a single, and reasonably weather-proof package
Plan
The overall idea for the box is that it is supplied power via a 12 V DC and has the ability to be connected to my local network via Ethernet. Why not WiFi, you might ask? I have never had really trouble-free operation with discrete devices running on WiFi; in other words, once they become unresponsive for some reason, one ends up having to walk to where they are and plug them in anyway. Having a wired connection just eliminates a frequent source of problems as far as I am concerned.
Surprisingly, perhaps, an ethernet connection and a 12 V supply can be achieved over a single CAT5 cable; read on at Power and Network on a Single Cable for seeing how that’s possible. The peripherals have a couple of different power requirements, thankfully all of which can be supplied using USB 5 V power distribution:
- Canon EOS 450D requires 7.1 V, achievable via a USB powered battery insert
- Lens warmer required 5 V but has a USB connector
- Raspberry Pi, 5 V powered via a USB C input
- Skywatcher mount, 5 V powered via a mini USB input
I had a search for something that would be capable of taking a 12 V input and stepping it down to 5 V with USB ports (not data, just power). Turns out, such a thing exists in the form of a 4 port USB power supply, I think for the automotive market - 12V To 5V 5A Step Down 4 Port USB DC Power Supply Module Mobile Tablets Charger as it was titled on eBay. Just make sure that if you do get one of these, always be sceptical regarding the current rating. It may well not be capable of having 5 A drawn from it!
With the above in mind I built up a list of things that would have to be purchased to start the project, namely:
- Raspberry Pi Model 4B
- 32 Gig SD Card
- IP66 Project Box
- 1 x short USB C lead (Pi power supply)
- 2 x Mini USB leads
- 1 x USB to 7.1 V Canon power pack
- 1 x 5 V / 5 A 4 port USB power supply, stepping down from 12 V + (sold in pairs)
- 5 V 40mm cooling fan
Next job was then to hit a well known auction site and do some shopping with the exception of the Raspberry Pi which would come from my usual supplier RS online.
Construction
The build took only a few hours once all the bits that I needed had arrived. Post being what it is at the moment (COVID-19 times) I had to wait a few weeks rather than a few days, but never mind… keeps one in suspense! The Raspberry Pi and USB power supply
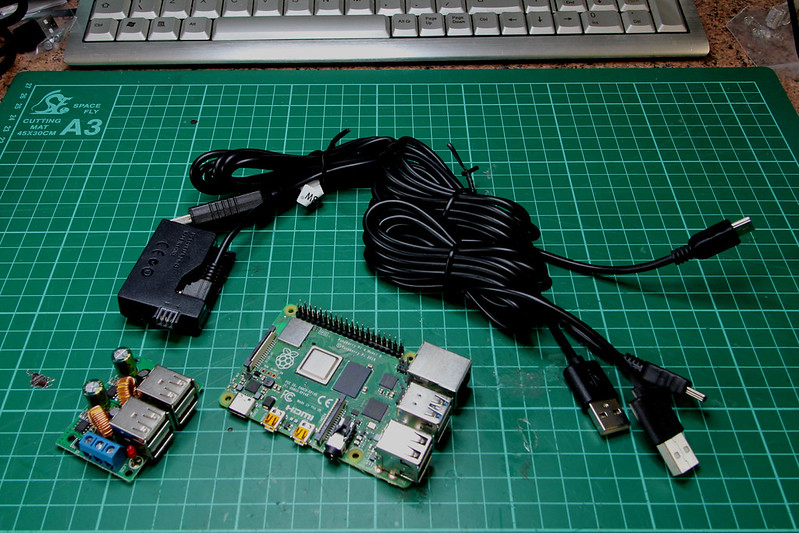
astrpi-dslr Parts
Power and Network on a Single Cable
Yes, it’s possible! As long as you are not after gigabit transfer speeds from the control box to somewhere else on your network; not a problem for me!
Use of sending power down 4 redundant lines in Ethernet.
| Pin | Function | Wire Colour (T568B ) | |
|---|---|---|---|
| 1 | TX+ | white/orange stripe | |
| 2 | TX- | orange solid | |
| 3 | RX+ | white/green stripe | |
| 4 | 12 V DC #1 | blue solid | |
| 5 | Gnd #1 | white/blue stripe | |
| 6 | RX- | green solid | |
| 7 | 12 V DC #2 | white/brown stripe | |
| 8 | Gnd #2 | brown solid |
You can probably see that there are a couple of spare pairs of wires…
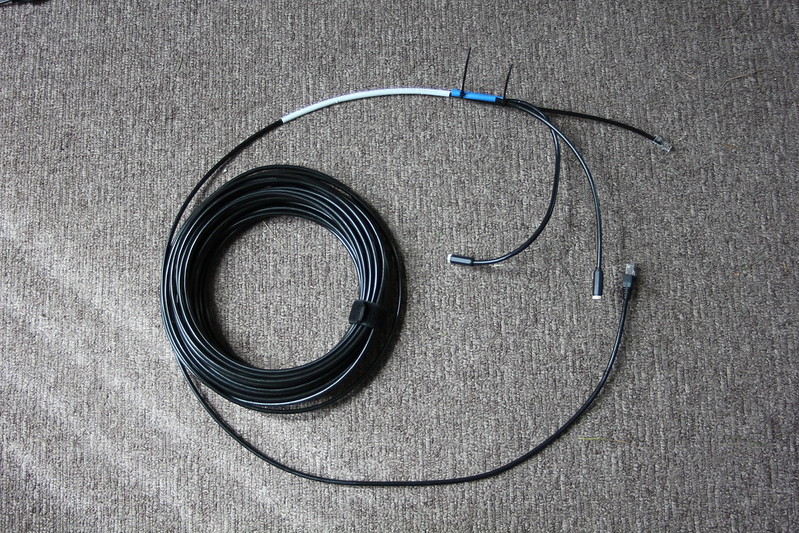
Power and network cable for astropi-dslr
LED for power and activity - no, go for a simple acrylic light pipe arrangement.
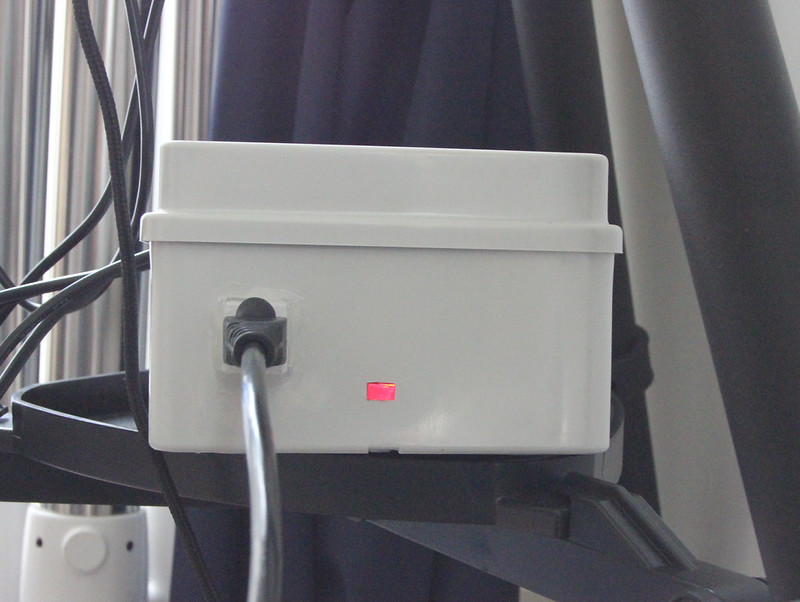
astrpi-dslr “on” light
Stuff
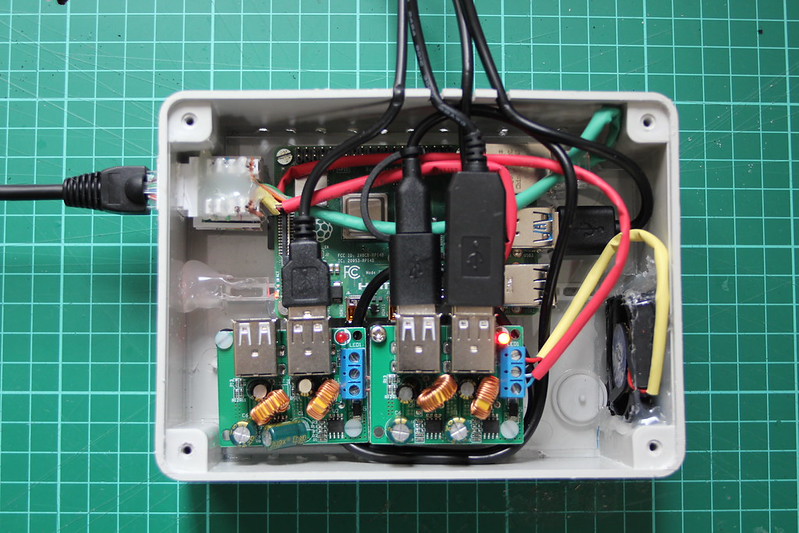
The astropi-dslr Internals
Things
Testing
Network issues where the Pi won’t connect. Aha, /etc/rc.local needs editing with an ethtool command.
# Limit net adapter speed to less than gigabit
ethtool -s eth0 speed 100 duplex full autoneg off
So it goes awry here when I start to connect all the bits. Low voltage causing the Pi to reset.
Result
Here it is
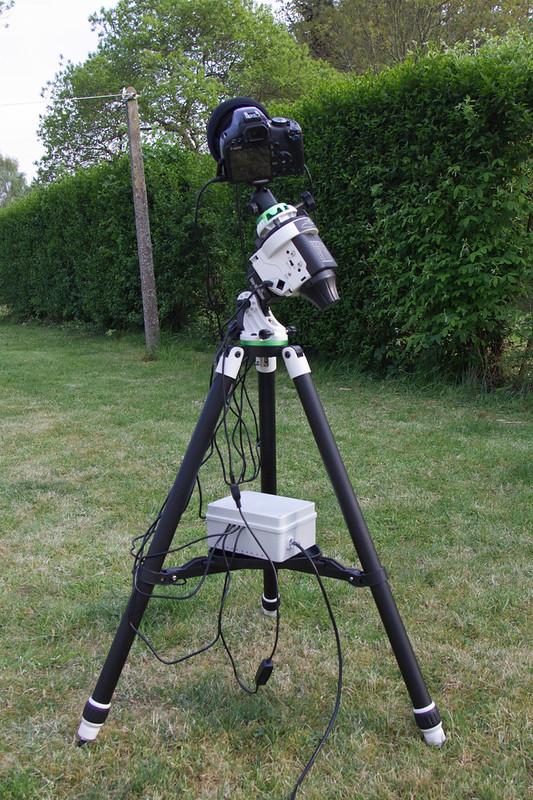
Up and running in the garden
Overnight Problem - Random Shutdown
So I decided to run an overnight test by setting up a sequence of 120 frames, 120 seconds each. Set the session running before bed and left it going by itself until the early hours. Waking up and checking the drive contents the following morning it becomes apparent that the Pi has rebooted itself at some point; only 93 frames had been taken and the uptime on the Pi was less than three hours.
The first step was to take a look at some system logs on the Pi. As it turns out I was lucky with my first strike - the kernel log at /var/log/kern.log:
pi@astropi-dslr:/var/log $ tail -f /var/log/kern.log
May 14 01:41:09 astropi-dslr kernel: [12360.802989] brcmfmac: power management disabled
May 14 01:43:35 astropi-dslr kernel: [12506.779127] Under-voltage detected! (0x00050005)
May 14 01:43:39 astropi-dslr kernel: [12510.939093] Voltage normalised (0x00000000)
May 14 01:45:37 astropi-dslr kernel: [12629.501028] Under-voltage detected! (0x00050005)
May 14 01:45:42 astropi-dslr kernel: [12633.660920] Voltage normalised (0x00000000)
May 14 01:46:25 astropi-dslr kernel: [12676.809172] IPv6: ADDRCONF(NETDEV_UP): wlan0: link is not ready
May 14 01:46:25 astropi-dslr kernel: [12676.809181] brcmfmac: power management disabled
May 14 01:47:38 astropi-dslr kernel: [12750.151926] Under-voltage detected! (0x00050005)
May 14 01:47:44 astropi-dslr kernel: [12756.381870] Voltage normalised (0x00000000)
May 14 01:49:41 astropi-dslr kernel: [12872.863049] Under-voltage detected! (0x00050005)
May 14 01:49:45 astropi-dslr kernel: [12877.023085] Voltage normalised (0x00000000)
May 14 01:51:41 astropi-dslr kernel: [12992.812574] IPv6: ADDRCONF(NETDEV_UP): wlan0: link is not ready
May 14 01:51:41 astropi-dslr kernel: [12992.812589] brcmfmac: power management disabled
May 14 01:51:43 astropi-dslr kernel: [12995.584406] Under-voltage detected! (0x00050005)
May 14 01:51:48 astropi-dslr kernel: [12999.744423] Voltage normalised (0x00000000)
May 14 01:53:44 astropi-dslr kernel: [13116.225814] Under-voltage detected! (0x00050005)
May 14 01:53:50 astropi-dslr kernel: [13122.465796] Voltage normalised (0x00000000)
May 14 01:56:57 astropi-dslr kernel: [13308.816476] IPv6: ADDRCONF(NETDEV_UP): wlan0: link is not ready
Test