Contents
Reviving the Project
A very brief part three of the, somewhat delayed, soil temperature monitoring project. This project has been left a little on the side gathering dust whilst I spent some time concentrating on the cloud detection project, but I am now determined to get this system up and running and its sensors in the ground before the winter weather sets in. Being in the ground soon will also mean that I get a good run before the cold weather hits.
At this point I have progressed with getting the electronics from breadboard to circuit board, well, Veroboard anyway. Also, the mission has crept slightly: after some more research, I have decided that the project is to become more of a surface/ground temperature station with the addition of minimum grass and concrete temperature measurements.
Extra measurements
Seeing as I was going to go to all the trouble of putting a box of electronics in the garden, I thought that it would be a good opportunity to make the most of it and add a couple of extras into the mix.
Grass Minimum Temperature
Grass minimum temperature is a useful property to keep an eye on, especially if you have a garden; a grass temperature of 0°C or less is an excellent indicator of ground frost. As from the Met Office's surface observations fact sheet the method of measuring grass minimum temperature is thus described:
For many years the grass minimum temperature has been defined as the lowest overnight temperature measured by a thermometer, fully exposed to the open sky, suspended horizontally over an area covered with short cropped turf and in contact with the tips of grass blades
Now many automated weather stations these days do not go quite that far; to attain a grass measurement, thermometers are now suspended 35 mm over an artificial grass surface to just about the same effect. I am going to aim to do something similar with a packaged DS18B20 suspended over a strip of cheap fake grass and see what happens.
Concrete Minimum Temperature
As with grass minimum temperature, concrete minimum temperature is useful if you want to know when ice has started to form, particularly if you happen to be needing to drive anywhere in the winter. It is certainly not a difficult measurement to take, as it will consist of one packaged DS18B20 and a small slab of home made concrete. Basically, I will lay a slab of concrete down on the ground so that it is almost level with the surrounding grass, making sure that the surface is completely exposed to the open sky (no overshadowing trees or whatever). I'll then need a couple of small strips of metal to use as bindings to ensure that the DS18B20 is fully in contact with the concrete.
Construction
The Circuit
As an outline idea, I had the circuit design in my head for a few months before wires were laid onto breadboard. I wanted a bi-state LED to indicate sensor status: green for OK and red for a problem; the reason being that once the soil sensors were underground it would be very useful to have an at-a-glance checking system. As above, I also decided that the circuit should be able to support up to five DS18B20 sensors (three for ground temperature, one for concrete temperature and one for grass temperature) [1].
Once committed to breadboard, it was but a short hop to getting the design on to some Veroboard. A few evenings of fun with solder later, and it lives!

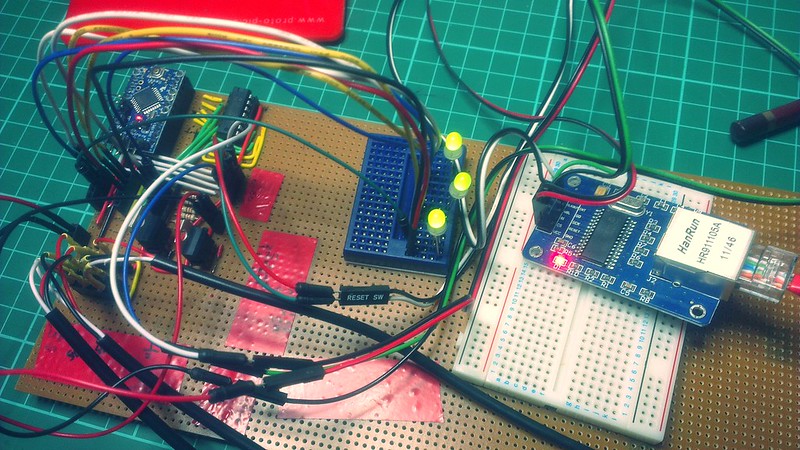
The circuit on a burn in cycle, sort of.
As can be seen from the above photograph, the left hand part is the built circuit (not as yet cut out from the rest of the Veroboard); in the center is a small breadboard with a few of the warning lights (all green because all the sensors are working fine); on the right hand side is the ENC28J60 module which will handle the communication over Ethernet.
In terms of managing on board power things are slightly complicated. The Arduino itself is a 5 volt model: an Arduino Pro Mini 328 - 5V/16MHz, and all the DS18B20 sensors are fine with 5 v also. However the ENC28J60 module is 3.3 v only, so it became a case of having to have multiple voltage regulators on the board. Not overly tricky, just a case of being careful as to where I would be routing power.
As an initial test I decided to 'burn in' the system on a 12 volt supply, and thankfully that was a success. I did not feel like I was over-supplying the circuit too much; just enough to get things nice and warm for a while and ensure that there was to be no smoke or fireworks. Once out in the field, I think that the supply voltage will be nearer 6 volts, depending on the length of cable, and hence voltage drop, between system and supply.
I chose to use sets of flying leads made from ribbon cable to route power, data and other things between the three separate circuit boards. The leads are all connected using 2.54 mm Dupont connectors rather than being soldered straight into the boards. I felt that this would enable me to dive in and repair or replace bits fairly easily in the future.
Boxing it Up
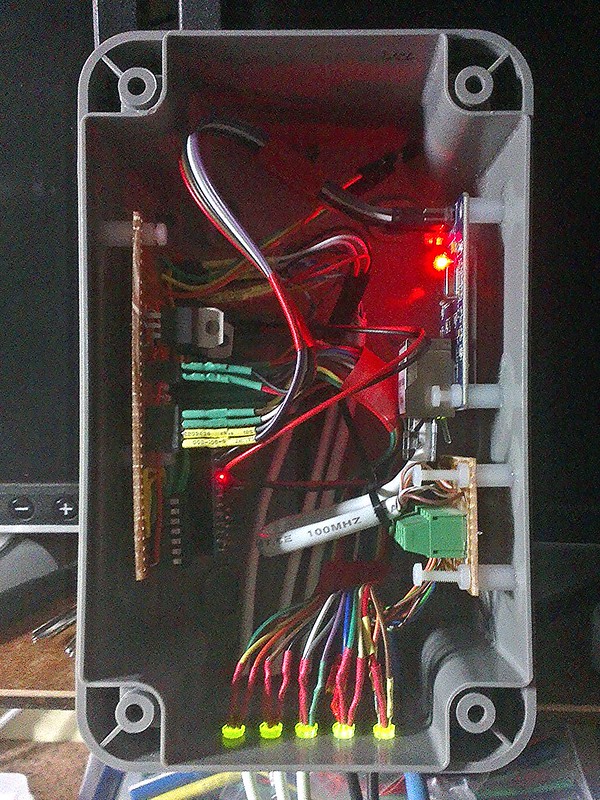
Choice of project box for this system was fairly limited; I wanted something reasonably hard wearing, weather proof and easy to work with. To my utter gratitude I found that my local DIY store stocked a range of ABS weather proof outdoor junction boxes - decision made. As for power and communications: the decision was made to go with a home made version of power over Ethernet, something I've since started to build into my cloud detection project - see here in part four for a further description.

Another overnight test of the system in its new home
So that's it for now; the next step is to get the whole setup outside. I have a feeling that there will be a whole load of challenges to get over before this system is in the ground and doing its thing, unencumbered by me making fixes to the hardware or software.
| [1] | I have since added a sixth sensor to give me the internal box temperature. |
Comments
comments powered by Disqus