Contents
The Problem
This project has its roots in a discussion I had a while back with a friend who is a keen amateur astronomer. He had been complaining to me about how he thought that there was a distinct lack of cloud free nights in our corner of Northern Lincolnshire. In fact, he suggested, the weather was so poor that it was hardly worth having a telescope at all.
Okay, so maybe that last sentence was a little exaggeration, but his argument certainly got me thinking - how many clear nights are there in the year? Being a bit of a skeptic, I am sure that the night sky is clear on many more nights than my friend suggests.

Some clouds, not far from where I live
So this got me thinking - how to measure? Being not only a skeptic, but a lazy skeptic, I wondered how I would be able to count clear nights without having to get up out of bed to go and physically look. There was no way I was going to set alarms at two hourly intervals to find that out. Naturally, the mind turns to remote detection, automation and logging. This sparked off a few days of research into how to measure cloud cover, and took me in many directions; some of which proved to be very interesting. In the end, pretty much all methods for measuring cloud cover come down to one thing - measuring radiated infra red light.
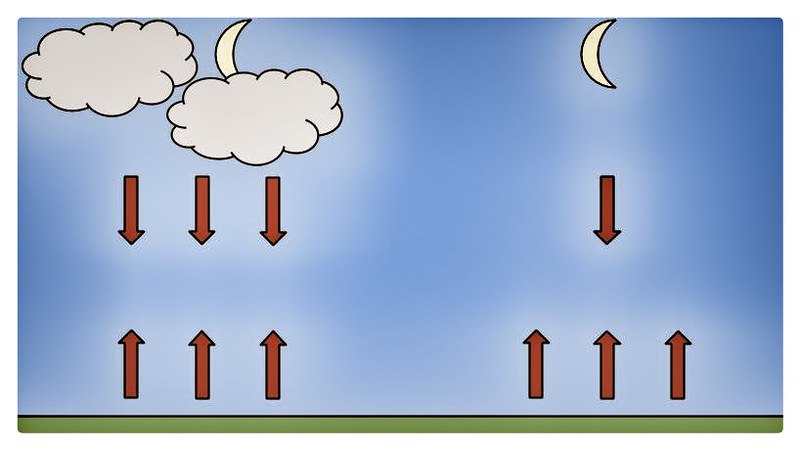
It seems that the easiest way to see how cloudy the sky might be (at night, don't forget), is to look at comparative amounts of infra red light; from the ground and from the sky and then generalise a measurement from there. Essentially, a cloudless sky (whether at night or during the day) radiates less heat than a cloudy one. Compare that to the temperature of the ground under your detector set up and with a lot of calibration and a little bit of luck, you can make a good stab at the level cloud cover.

Cloudy versus clear nights and resulting infra red radiation
What about data collection? The measurement method is only half the story, as once measurements are made they will need to be recorded somewhere. It seems to me that the ideal candidate will be an Arduino combined with a way of data retrieval, via serial, ethernet or some other route.
Measurement Methods
During my research I only found two possible methods for comparing ground and sky temperature. All other possibilities were discarded on grounds of cost, my technical (and brain!) limitations, and feasibility.

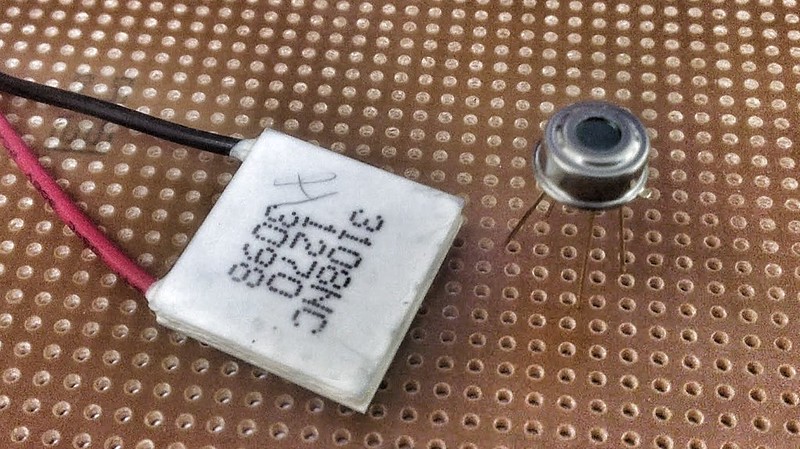
Peltier cooler on the left, MLX90614 sensor on the right
Both methods discussed are based on measuring the difference between sky and ground temperature.
Option One: The Peltier Cooler
According to the Kitt Peak National Observatory web site it is possible to build a thermoelectric sensor based on a device known as a peltier cooler. This detection method utilises the thermoelectric effect whereby a differential of temperature between two surfaces generates a voltage output. This is a reversal of a Peltier cooler's normal use, where a voltage input generates a temperature difference between the two surfaces.
It is therefore supposed a Peltier cooler sandwiched between two isolated aluminium plates, with one plate facing the sky and the other facing the ground, should able to measure the temperature difference between the sky and the ground.
I am assuming that there would have to be some kind of masking set up to ensure that the plates had a view of a measurable area of sky.
Below are some of the advantages and disadvantages of such a system.
Advantages:
- Build costs are relatively cheap; Peltier coolers are readily available at low cost.
- System is reasonably weatherproof; won't require specific protection from the elements.
- The electronics should be fairly simple to put together; just a case of reading analogue output from the sensor.
Disadvantages:
- System will not work well in dewy conditions and does not work at all in the rain.
- Temperature measurement will have to be inferred, as it does not yield an actual temperature reading.
- There exists uncertainty regarding how sensitive the system will be.
- Because of the sensitivity issue, calibration may also be difficult.
Option Two: The Infrared Thermometer - MLX90614 Series
I originally found this MLX series thermometer on the U.S. based Sparkfun site site and was immediately intrigued. The 90614 is a hermetically sealed factory calibrated digital infra red thermometer, packaged in a small TO-39 metal can. They calculate the temperature of the object in view by taking into account the difference between the object and the ambient temperature within the package, measured separately. The cheapest (and most widely available) model has an FoV of 90°. I do have minor concerns that the FoV might be a little too much; testing will tell me all I need to know.
My plan for these thermometers would be to have one unit facing the sky, another unit facing the ground and taking the difference in readings as an approximate measure of cloud cover.
Again, here are some advantages and disadvantages of such a system.
Advantages:
- With higher sensitivity the system should be able to detect more nuanced changes in cloud cover.
- Whilst rain will still stop this system from working, it should not be so badly affected by dew.
- Will yield an actual temperature and won't need much calibration
Disadvantages:
- Build costs are higher than those of the Peltier cooler - the thermometers are more costly and not as easy to get hold of.
- The electronics may be more complex, such as having to deal with I²C busses and so on.
Early Experiments
Before starting on any prototype electronics I thought that I would take some representative measurements of the sky and the ground in different conditions with a digital non-contact thermometer, just to get an idea of the temperature range I might be dealing with here. I got hold of a cheap point and shoot laser type model from my local electronics shop. The thermometer has a digital readout with a range of between -40°C to 365°C, and a (very roughly calculated) field of view (FoV) around 7° when pointed at the sky.
Test Results
Some data output from early tests
It is my belief that neither the MLX or the Peltier (discussed above) will be as sensitive as the thermometer I used in this experiment, for reasons that shall become clear later, therefore the extremes of -40°C should not be experienced in the future.
Finally
Over the next few weeks and months I am going to try out both solutions hooked up to an Arduino and let you know how I get on.
Comments
comments powered by Disqus